Saturday, July 6, 2013

Painting Foam Armor Part 1

Alright, with some requests to me about how I paint EVA foam, I thought I would write this up!

I will cover the tools needed, the supplies that I use, and types of paints to use.

For this part 1, I will cover the first step in sealing EVA foam.
EVA foam is the common foam that is used to build costumes like Iron Man and Halo armor.
Sealing the foam in important if you want a clean, smooth, and glossy finish. If you want a more rough texture, then this first step can be skipped.

Tools and supplies for part 1
A heat gun. A hair dryer can work as well.
That is it!


Sealing is pretty simple, just turn on the heat gun and run it over the foam. You will be able to see the foam change color slightly and turn somewhat smoother. If you have ever used a heat gun to warm foam so you can bend it, you will know what I am talking about.


The second picture shows the foam after it has been heat sealed.

I do this twice. The second time you will see no major change, but its a good thing to do, just in case you missed a spot on the first run. And dont forget the edges.

That is it for part 1. Part 2 will cover the second step in sealing as well as priming for paint.

Saturday, June 15, 2013

Tutorial: Whats Next?

Well I asked a few months ago for what people want to see as a tutorial. Seems most wanted to see my process for painting foam armor. This fits quite well as I am working on another foam suit. So I will make a ton of pictures and make a video or two for my YouTube page!

Keep looking as I will start this process in about a week and a half!

One Life Cosplay

I wanted to share my fiance's blog. Many of the items that I talk about end up on her page as well, but from a different angle.

http://onelifecosplay.blogspot.com/

Check it out!

Hello again

Long time no write for me......

Been busy with all the conventions, panels, and college.

Just wanted to update my readers about whats going on here with us.
First up. Iron Man.... I have retired my Iron Man Mark IV armor. This was something I have been planning to do for a few months. But it could not have come at a better time. Rubies is going to start making Iron Man suits along with the Star Wars ones they make. I have also become the "guy who dose Iron Man" around Colorado. I dont want to be labeled as only a single costume, but as a cosplayer all together. So with that, I am bringing updates on the next set of projects that are already under way!

Aquaman! This will be based on the Injustice suit. It will be made out of Wonderflex, Worbla, and Scalemail. This is something that should be a eye opener for people! We also have a local comic book artist, Matt Campbell, working on a concept for a matching Mera. It will follow the same style as the Injustice Aquaman but will have a twist!

Next up is a series of suits that some friends and I will do together. I watched Man of Steel this past week, and was very impressed with General Zod and Faora. So I think some suits are in order! They will use Wonderflex, Worbla, foam, and some other materials to get the look down right!

I have also joined the 501st Legion. The 501st is a Star Wars costume group that is across the world. Normally I dont like doing things that a ton of people do, however, what they stand for speaks to me. So I will do what I can to help. For the 501st build, I am making a Scout Trooper, or more commonly called the Biker Scout from Return of the Jedi.

Last is my secret project. All I can say with this is that it is something that people have talked about doing, but never have. At least I have not seen it yet. Some readers may know what this is, but for everyone else.... its green and gold, and will be armor plated! Go Green Ra...........to obvious?
Ok ill break down..... Iron Man inspired Green Power Ranger!!!!!!!

Friday, April 5, 2013

New YouTube Channel

Well I deleted my old YouTube channel. It was about computers and hardware, but did nothing with it over the past couple years....

But now I have a channel all for costumes and everything that I love!

http://www.youtube.com/SteamandCostumes


Nothing up yet, but there will be some soon!

Monday, March 11, 2013

Movie Review - Oz: The Great and Powerful

Well as it stands, this is my first official movie review!

Oz: The Great and Powerful
Staring
James Franco - Oz
Mila Kunis - Theodora
Rachel Weisz - Evanora
Michelle Williams - Glinda/Annie
Zach Braff - Finley/Frank

The movie opens much as you would expect from a Oz movie, black and white and in a letter box aspect ratio. Oz is a failing magician in a traveling circus. He is played off as some sort of playboy of the circus, always trying to find the next girl. It seems that he would use the same story over and over to get attention from the women of the circus. I feel that this would have been discovered early on in his career with the circus, however, there is no indication that it was happening for his entire time traveling. After a performance with a attempt of a tear jerker with Oz being asked by a little girl to fix her legs so she can walk, saying that she believed in him. Oz is visited by a woman from the town near by, Annie. Yes it is that Annie. After she talks with Oz about their past relationship, one of the circus folk comes after Oz, due to his playboy nature. We are left with Oz escaping in a hot air balloon that is being drawn into a twister. End opening act.

Now that Oz was in the land of Oz, the screen opens to full wide and we get a blast of color. Something that people may or may not know about the Oz stories by Frank Baum, color is a very important aspect. Depending on the color of clothing, cities, and other things in the world, you can obtain a quick understanding of the surroundings. With me knowing this, I was no surprised by many of the "twists" in the story. But I am sure the average movie buff will still have a surprise waiting for them. After meeting with Theodora, being taken to the Emerald City, and being twisted by Evanora, Oz leaves to try and kill the bad witch.

The little girl that could not walk from the opening returns as a china doll that has broken legs. Oz is sure quick to fix the broken legs with glue. Seeming putting closure to that side story.

Spoilers ahead


As it turns out, the bad witch is Evanora. This is quickly reveled when she give a apple of all things to her sister Theodora. It turns her into the green witch that we have seen in the original movie.

Oz is left to retake the city and save the land of Oz. After faking his death, he uses a machine to make him self appear as a face in smoke.

All is good after a few words are exchanged and the two evil witches leave.


End Spoilers


Oz does not return to our world, but stays to offer wishes to the people of Oz.


This movie is a kids movie for sure. It would appeal to adults as well or anyone who is a fan of Frank Baum, as this is one of his original stories. The repetitive of lines about being good and great, the worn out coming of age story, and the attempt to put to much of The Wizard of Oz into the movie made for a slight disappointment. This movie is its own story, it should not and can not be compared to The Wizard of Oz.
All in all I would give it a 7 out of 10. This would be a movie I would buy on DVD or Blu-ray but not see in theaters again.

Wednesday, February 27, 2013

Rinzler Suit part 1

Starting to work on the Rinzler suit.

So far I have a pattern for the chest that was made on a few pieces of paper, then cut out and transferred to a large piece of paper

So here we have


Also on the note of costumes, I have been asked to make a tutorial on painting foam armor to give a metallic shine, such as the Iron Man armor. Stay tuned, it will come pretty soon!

Friday, February 22, 2013

Tron Disc

Well tomorrow is our local Armor Party, and I will be working on the Tron discs. I will be sure to post up some pictures of the results.

Until then here is something to look at, its some inspiration for the costumes!


Tuesday, February 19, 2013

Whats Up

Hello everyone.

Just giving a update to whats coming next. The Hylian Shield tutorial part 3 will be delayed slightly as I want to figure out exactly what I would and can do with the back side of the shield.

However, I will be providing a basic LED tutorial and information post very soon. I have seen that many of my friends struggle with knowing what to do for LEDs, so I feel its only right to make my knowledge accessible to them, as well as anyone else who reads this blog.

I will also be demoing some other projects and products that I am making and/or using. Some include modding a SpinMaster Tron disc, EL tape, Pepakura information, and a review of a new product from My good friend Ryan aka TheRealStark.

Last thing I would like to mention is I will writing my first movie review in March. It will be for Oz: The Great and Powerful. This will be somewhat of a bias review, but with good reason. The movie is released on March 8th, my birthday, and I tend to go easy on movies that come out on that day! This is a warning that it might be bias.


http://dribbble.s3.amazonaws.com/users/6303/screenshots/590187/tron_disc_2.png

Sunday, February 17, 2013

Tron Update

Well I broke down and ordered some EL tape.

I have the entire EL tape set for my Rinzler costume as well as some of the parts we know for sure Val will need for her Quorra. Once we make some more progress on the Quorra suit we will get the rest needed.

The reason Rinzler was easy is because there is a store in the UK that sells a complete EL tape kit for Rinzler. Quorra on the other hand, dose not have a kit available that I have found. So I don't want anyone thinking that I am putting my costume in front of Val's. They are both equally important to me and they will both be complete by Denver Comic Con 2013!

Hylian Shield Tutorial part 2

Alrightly, well here comes part 2 of the Hylain Shield Tutorial


Shopping list for part 2
Silver Leaf Rub n Buff
Ruby Rub n Buff
Black spray paint
Blue spray paint
Glue gun ans glue sticks
Small wooden buttons
Utility knife and scissors
Pencil and marker
Yard stick
And everything from part 1

First up I will show you how much curve I got from part 1, I didn't get a good pic last time


This should give a good example to how much curve you need from the shield


Next I took the second outline that I had left over from part 1. I free handed a outline in pencil the basic shape I wanted the boarder to be.

Once I had a basic shape, I used my yard stick to make sure everything was square and lined up correctly. After I was satisfied with the boarder, I filled it in with marker. 


Next step was to cut out the boarder with the utility blade. I would recommend making sure it is the right size after cutting.


After checking to make sure everything lined up and looked right, I finished cutting out the foam parts from part 1


Now for the fun... I used Ruby Rub n Buff on the bird. This gave it a great copper color. The copper is what I wanted from this, as I am going for a real world look. If you are going for a game look I would use red spray paint. Also I finished up the top detail pieces with Silver Leaf Rub n Buff.


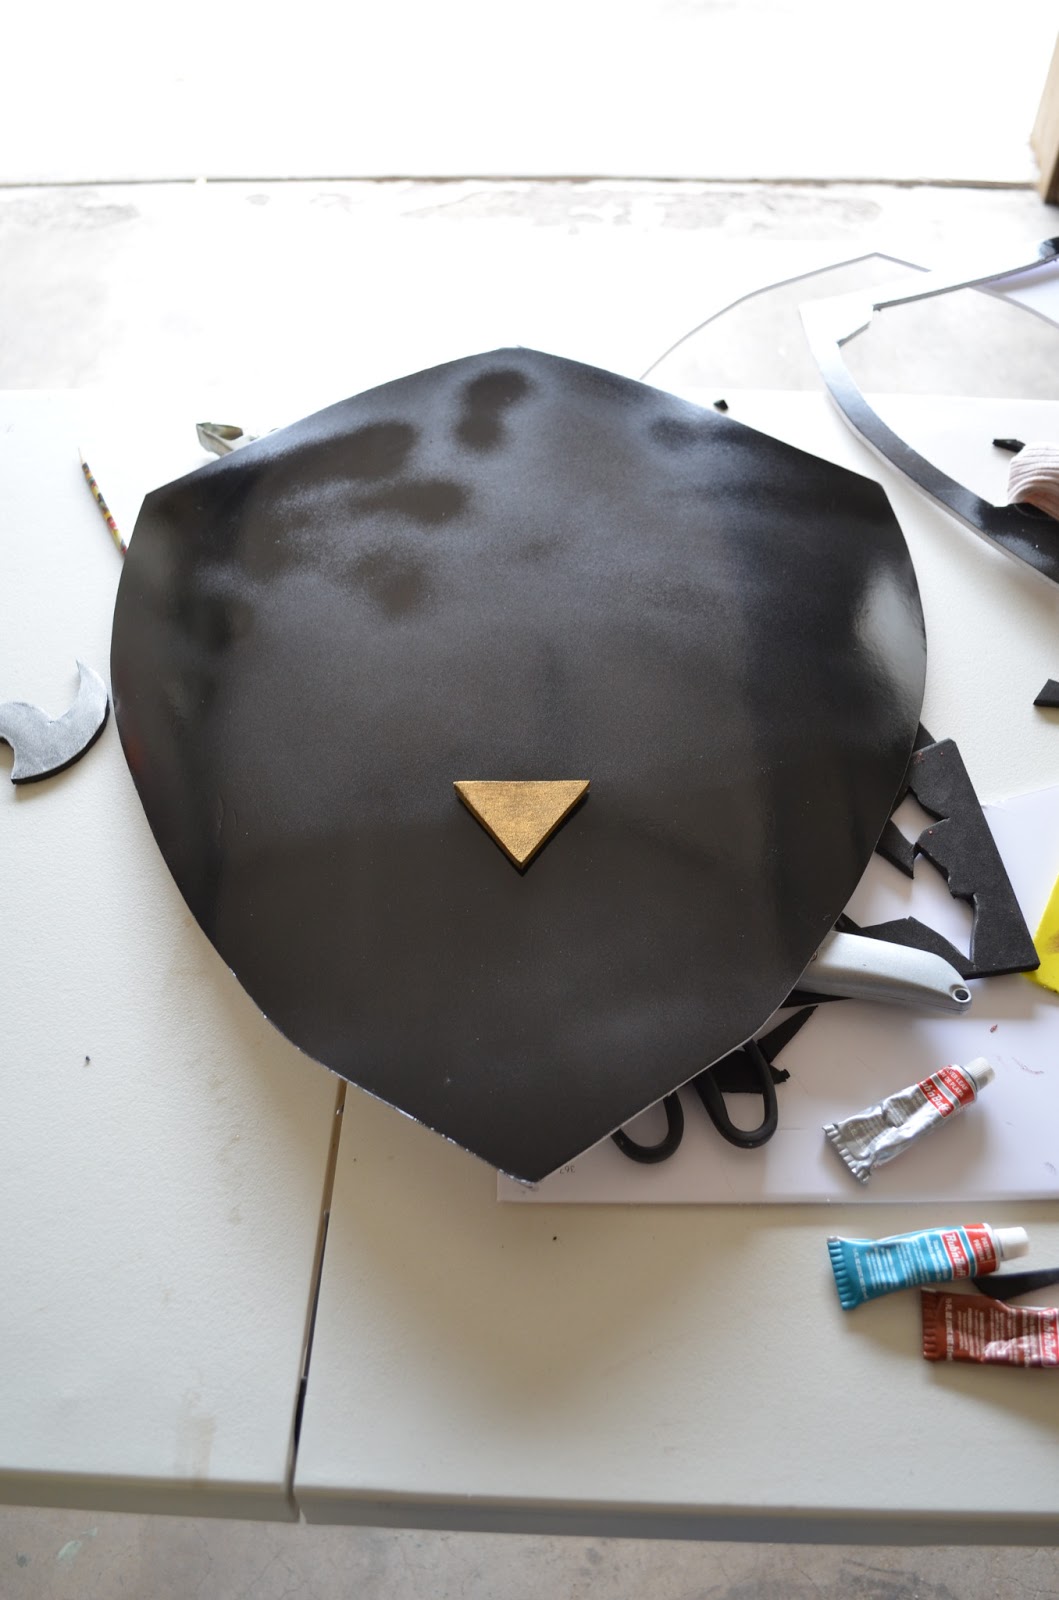
The next step was to paint both the shield and boarder with black spray paint.


My original intention was to use a mixture of Patina and Sapphire Rub n Buff for my blue color on the shield. However, I must have a bad tube on one or both of the colors. It looked horrible and I was not happy. Therefor, I went with blue spray paint for the main base of the shield. If you want to just do the blue paint and not risk a bad color from Rub n Buff, just skip the last step of painting the shield black. The boarder should still be painted black however.


With everything painted, I glued the boarder and detail parts where they need to go. The boarder was a bit tricky as it was not curved. I used some clamps to hold it in place as I glued.

Finish up with Silver Leaf Rub n Buff on the boarder and edges and you should have something like this!


Note I added some Silver Leaf Rub n Buff to the blue section to add some weathering.


Stay tuned for part 3, where I will go ever finishing up the back side with color, leather straps, and anything else neat I come up with!


If there is another prop you would like to see how to make, just post a comment! I am always looking for new items make, I would LOVE to show my process of making them for others to enjoy!


First Commission!

During Galaxy Fest 2013 here in Colorado Springs, I was able to pick up my first real major commission. I have been making the Steampunk Nerf guns for people for a while, but this is something new.

I will be making a fully working Hell Boy ROD(Right-Hand Of Doom)
This will require some interesting ideas to be able to have the fingers move and still maintain the look.

I will post progress pictures as I work on the hand!

Deadline is May 31st for Denver Comic Con 2013

Hylian Shield Update

Part 2 of the tutorial coming TODAY!!!!

Sunday, February 10, 2013

GalaxyFest ~ Saturday

Had a great time yesterday at GalaxyFest. I entered the Iron Man suit into the costume contest. They only did prizes for the top 2 in each category, and thus I didnt win anything. If they did top 3 I would have placed 3rd. Hears hoping for next year!

On that note, I am off for another day!

Saturday, February 9, 2013

Hello All ~ GalaxyFest

I will not be making a update to the shield tutorial this weekend due to a local convention that I am attending.

Just a heads up!

Sunday, February 3, 2013

Hylian Shield Tutorial part 1

So today starts the tutorial on the Hylian Shield.

First up I am going to bring up again that this is going to have a more real world color set and not as bright and clean as the game shield.

Each part of the tutorial will have a shopping list

Shopping list for Part 1
2 foam core poster boards
1 12x18 piece of EVA or craft foam, I used the thicker kind
A water spray bottle
Gold Leaf Rub n' Buff
A piece of newspaper
Pencil and a marker
320 grit sandpaper
Utility knife and scissors


To start, I unfolded the newspaper, and with some reference images, I drew out the basic shape I wanted for the shield. I then cut out the new paper.


Next I traced out the design onto the the first piece of poster board


I then used the utility knife to cut out the shield. I also used the sandpaper to sand down the edges to make them smoother and round out any jagged points


After this point, I felt I needed to make a second cutout of the shield in case of mishaps. I used the shield that I cut out of the poster board top trace the next one.

Now After completing the shield to beyond where part 1 of this tutorial without mishaps to the first cutout, I am glad that I made a second one for something else that will be in part 2 or 3


Once I got both traced, and the first cut out, I wanted to give the shield a concave look. To do this, I propped it up on some RedBull cans and wet down both sides lightly with water from a spray bottle. I then added some weight to the top so that when the water soaks into the poster board, it will give me the desired shape. I left the weight on the shield until it was every so slightly beyond where I wanted the curve to be. Then I removed the weights and let it dry.


During the time that the poster board was setting up for the concave shape, I took my foam and traced some templates for the different designs that go into the shield. I found a template on Google images that I liked and re-sized to fit. This took a lot of trail and error to get the size right, but I think it will be worth the hassle!


With the Tri-Force and smaller triangle cut out of the foam, I used some of the Gold Leaf Rub n' Buff to color them. I like the Rub n' Buff for this because you can give a lot of control to how much you want to use, and its a very nice and real looking color that will help with my desired finish. 


This concludes part 1 of the Hylian Shield tutorial
Stay tuned for part 2!

Saturday, February 2, 2013

Tutorial Choice

Well I didnt get any messages or comments on what tutorial people wanted to see :-(

But thats ok, you get to see what I am making then! Over the next week I will be putting together a tutorial on how to make a Hylian Shield from The Legend of Zelda. Now I will be taking a slightly different approach to the shield. I want to make it look more real world than the cartoonish look of the games.

Stay tuned!

Photo from Zelda.wiki

Tuesday, January 29, 2013

Update on Tron

Well if you didnt get my clues left in my last post, the next set of costumes that Val and myself are working on are Tron costumes. Val is working on a Quorra costume that is going to be made up of Under Armour, a leather jacket, a modded toy disc, and either LEDs or EL tape. I am thinking about a Rinzler costume that will be made with the same items. The Rinzler costume will also require a helmet, in that I have not found anyone that makes them, I may have to sub a Clu or Quorra helmet and just change the lighting color. Over this upcoming weekend, we will have a great start on the Quorra costume and I will do my best to post some pics. We have just about everything needed except the LEDs and/or the EL tape.

Keep checking back for more info.

Coming in the next couple weeks is going to be a tutorial on something costuming, so if there is anything you want to learn about, post up in a comment!

Tuesday, January 22, 2013

Starting Work on the Next Project

Well we, Val and I, have started our next project. After having some down time.... and being kicked many times about not making any costumes, we are ready to get to work. So far we have spent $7.... and this is putting us well on the way.

With that I leave a clu.... or two...so that I can change the scheme, alter the mood. Electrify the boys and girls if you'd be so kind.

Big Project in the Works

Enough said in the title!

Stay tuned.....

Tuesday, January 8, 2013

Iron Man Update and Vender Showcase

Ok I am here with a update on Iron Man. This is going to double as my first vender showcase. Today I will be talking about my friend Ryan Brooks aka TheRealStark. He is vender on the forum therpf.com under the name TheRealStark. He builds custom Iron Man electronics including walking sound effects, repulsors, helmet hinges, and unibeams. I will be showcasing the repulsors and his older unibeam model. He has since stopped production the the unibeam that I have, but has a comparable model in the works.

Ok on to the fun!
The repulsors that I ordered are the ones that have sounds, and they do sound great. The package includes 2 circuits, 2 costume designed LED boards, 2 speakers, 2 batteries, and a charging cable.
The circuits are very small, just a hair over a square inch. They have a tilt sensor that will read the position of your hand. When you put your hand up, just like Iron Man does to fire his repulsor beam, the LEDs will brighten and flash, and there will be a charging and blast sound. Very cool, but my favorite feature is when you put your hand down, in a prone position, the light will fade off and you will have a powering down sound. This give two great things in one, first being it looks like the movie when Iron Man powers down his repulsors, but also saves on the battery. This is a very well thought out design and set of features.


Next is the Unibeam. The model that I have has three modes, first being steady on, second being a blast, and third being a battle damage mode. The modes are switched by waving a magnet by a reed switch hidden in the unit. When you first turn on the unibeam, you get a fade on of the LEDs and a charging up sound. Once the unibeam is "charged," it will have a nice steady sound, almost like electrical humming. When you wave the magnet by, the LEDs brighten, it makes a charging sound, then a blasting sound with flashing lights, then will return to a steady on. Wave the magnet by again and the LEDs start to flicker at a random rate, as well as a damaged electrical sound.  Wave the magnet again and you are brought back to the steady on with the humming sound. Currntly Ryan offers a unibeam circuit that functions the same as what I have, but much more compact. There are plans to offer a housing for the new model sometime in the future, but I cannot speak on that for certain.

Unibeam pictures coming soon

Now back to the Iron Man suit. When I built the suit last year, I had bought the unibeam from Ryan and it was already incorporated into the suit. I have since upgraded my simple, and ugly, hand repulsors to the ones that Ryan offers. I am currently waiting for a new set of gloves to install the repulsors into, as my gloves have been worn down pretty good. Once I get the gloves I will upload some of my personal videos of the suit and the parts from Ryan all working.

Until then, check out the videos from TheRealStark here
https://www.youtube.com/watch?v=oyyYQ9YSya4
https://www.youtube.com/watch?v=mkpdg8_5Mu0

Also be sure to check out his sale threads at therpf.com
You need to register in order to view the junkyard threads where his items can be purchased and viewed. Its free to register and is a great community for anyone who loves movies and costumes!

Monday, January 7, 2013

Nerf Guns

Ok here we go. I got some pics of the Steampunk Nerf guns at last!

First up I will start with something a little boring. This is not a Nerf gun so yea, but its done the same way. Very simple yes!


Now to the Nerf guns. First up is a shotgun for a friend, and the finial picture is a Maverick for a customer. 


I do want to say sorry about the delay, and about the crappy cell phone pics. I have a Nikon D5100 that I use for things like this, I was just being slightly lazy!

Iron Man update

Well after the long run of building the suit... Started July 2012, switched to foam on September 17th 2012, and finished for photos on October 2012, I feel its time to give it a upgrade.

I have some big plans set for it, they include new Repulsors, better helmet hinges, new hands and boots, and a few other slight fixes.

On the subject of Iron Man, here is a update from the world of Marvel Studios. This is a great piece from Rebecca Hall about working with director Shane Black. This article is from IGN and by Eric Goldman.
http://www.ign.com/articles/2013/01/07/rebecca-hall-talks-iron-man-3-and-shane-blacks-great-wit-and-intelligence?abthid=50eb4f23bf895795410000ce

Friday, January 4, 2013

Sorry

Just a update. I am sorry I wasn't able to get anything new posted as I have a cold. I will get some new stuff posted up ASAP!


Wednesday, January 2, 2013

Steam Nerf update

Update on the Steampunk Nerf guns. I have finished 2 of them, and will have some pics later today!