Alrightly, well here comes part 2 of the Hylain Shield Tutorial
Shopping list for part 2
Silver Leaf Rub n Buff
Ruby Rub n Buff
Black spray paint
Blue spray paint
Glue gun ans glue sticks
Small wooden buttons
Utility knife and scissors
Pencil and marker
Yard stick
And everything from part 1
First up I will show you how much curve I got from part 1, I didn't get a good pic last time
This should give a good example to how much curve you need from the shield
Next I took the second outline that I had left over from part 1. I free handed a outline in pencil the basic shape I wanted the boarder to be.
Once I had a basic shape, I used my yard stick to make sure everything was square and lined up correctly. After I was satisfied with the boarder, I filled it in with marker.
Next step was to cut out the boarder with the utility blade. I would recommend making sure it is the right size after cutting.
After checking to make sure everything lined up and looked right, I finished cutting out the foam parts from part 1
Now for the fun... I used Ruby Rub n Buff on the bird. This gave it a great copper color. The copper is what I wanted from this, as I am going for a real world look. If you are going for a game look I would use red spray paint. Also I finished up the top detail pieces with Silver Leaf Rub n Buff.
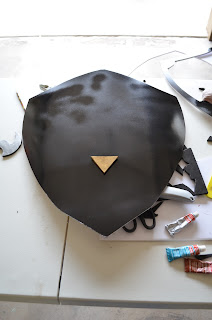
The next step was to paint both the shield and boarder with black spray paint.
My original intention was to use a mixture of Patina and Sapphire Rub n Buff for my blue color on the shield. However, I must have a bad tube on one or both of the colors. It looked horrible and I was not happy. Therefor, I went with blue spray paint for the main base of the shield. If you want to just do the blue paint and not risk a bad color from Rub n Buff, just skip the last step of painting the shield black. The boarder should still be painted black however.
With everything painted, I glued the boarder and detail parts where they need to go. The boarder was a bit tricky as it was not curved. I used some clamps to hold it in place as I glued.
Finish up with Silver Leaf Rub n Buff on the boarder and edges and you should have something like this!
Note I added some Silver Leaf Rub n Buff to the blue section to add some weathering.
Stay tuned for part 3, where I will go ever finishing up the back side with color, leather straps, and anything else neat I come up with!
If there is another prop you would like to see how to make, just post a comment! I am always looking for new items make, I would LOVE to show my process of making them for others to enjoy!


No comments:
Post a Comment