Sunday, February 17, 2013

Hylian Shield Tutorial part 2

Alrightly, well here comes part 2 of the Hylain Shield Tutorial


Shopping list for part 2
Silver Leaf Rub n Buff
Ruby Rub n Buff
Black spray paint
Blue spray paint
Glue gun ans glue sticks
Small wooden buttons
Utility knife and scissors
Pencil and marker
Yard stick
And everything from part 1

First up I will show you how much curve I got from part 1, I didn't get a good pic last time


This should give a good example to how much curve you need from the shield


Next I took the second outline that I had left over from part 1. I free handed a outline in pencil the basic shape I wanted the boarder to be.

Once I had a basic shape, I used my yard stick to make sure everything was square and lined up correctly. After I was satisfied with the boarder, I filled it in with marker. 


Next step was to cut out the boarder with the utility blade. I would recommend making sure it is the right size after cutting.


After checking to make sure everything lined up and looked right, I finished cutting out the foam parts from part 1


Now for the fun... I used Ruby Rub n Buff on the bird. This gave it a great copper color. The copper is what I wanted from this, as I am going for a real world look. If you are going for a game look I would use red spray paint. Also I finished up the top detail pieces with Silver Leaf Rub n Buff.


The next step was to paint both the shield and boarder with black spray paint.
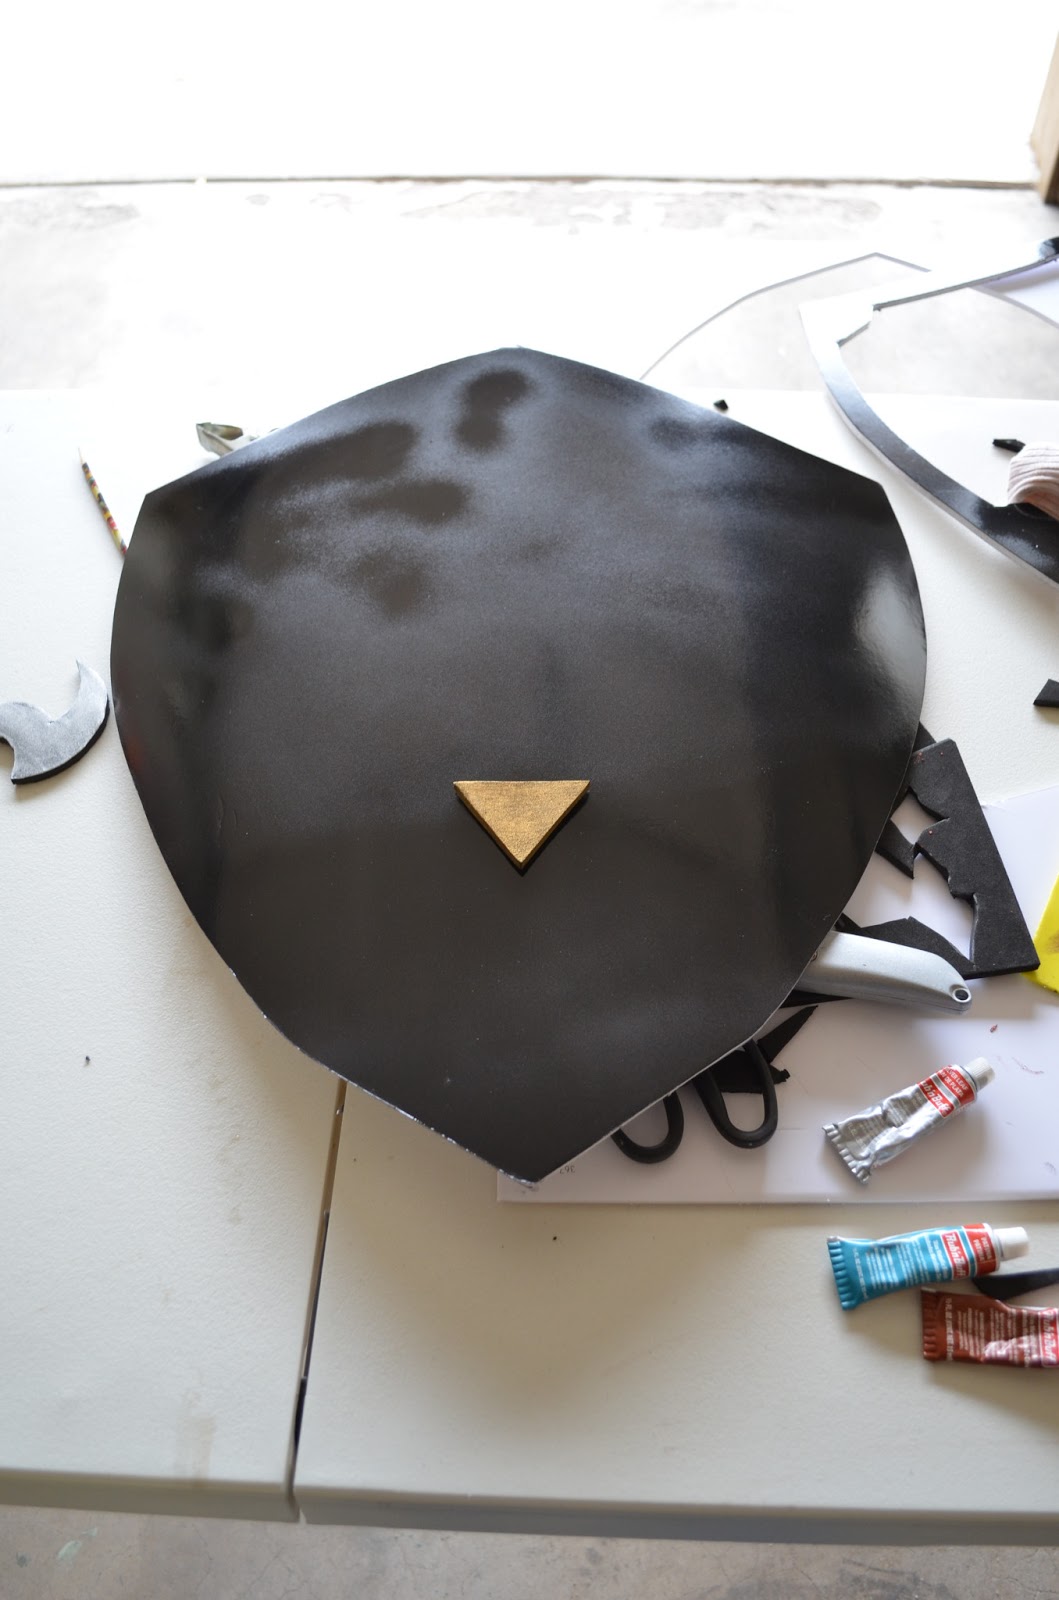


My original intention was to use a mixture of Patina and Sapphire Rub n Buff for my blue color on the shield. However, I must have a bad tube on one or both of the colors. It looked horrible and I was not happy. Therefor, I went with blue spray paint for the main base of the shield. If you want to just do the blue paint and not risk a bad color from Rub n Buff, just skip the last step of painting the shield black. The boarder should still be painted black however.


With everything painted, I glued the boarder and detail parts where they need to go. The boarder was a bit tricky as it was not curved. I used some clamps to hold it in place as I glued.

Finish up with Silver Leaf Rub n Buff on the boarder and edges and you should have something like this!


Note I added some Silver Leaf Rub n Buff to the blue section to add some weathering.


Stay tuned for part 3, where I will go ever finishing up the back side with color, leather straps, and anything else neat I come up with!


If there is another prop you would like to see how to make, just post a comment! I am always looking for new items make, I would LOVE to show my process of making them for others to enjoy!


First Commission!

During Galaxy Fest 2013 here in Colorado Springs, I was able to pick up my first real major commission. I have been making the Steampunk Nerf guns for people for a while, but this is something new.

I will be making a fully working Hell Boy ROD(Right-Hand Of Doom)
This will require some interesting ideas to be able to have the fingers move and still maintain the look.

I will post progress pictures as I work on the hand!

Deadline is May 31st for Denver Comic Con 2013

Hylian Shield Update

Part 2 of the tutorial coming TODAY!!!!

Sunday, February 10, 2013

GalaxyFest ~ Saturday

Had a great time yesterday at GalaxyFest. I entered the Iron Man suit into the costume contest. They only did prizes for the top 2 in each category, and thus I didnt win anything. If they did top 3 I would have placed 3rd. Hears hoping for next year!

On that note, I am off for another day!

Saturday, February 9, 2013

Hello All ~ GalaxyFest

I will not be making a update to the shield tutorial this weekend due to a local convention that I am attending.

Just a heads up!

Sunday, February 3, 2013

Hylian Shield Tutorial part 1

So today starts the tutorial on the Hylian Shield.

First up I am going to bring up again that this is going to have a more real world color set and not as bright and clean as the game shield.

Each part of the tutorial will have a shopping list

Shopping list for Part 1
2 foam core poster boards
1 12x18 piece of EVA or craft foam, I used the thicker kind
A water spray bottle
Gold Leaf Rub n' Buff
A piece of newspaper
Pencil and a marker
320 grit sandpaper
Utility knife and scissors


To start, I unfolded the newspaper, and with some reference images, I drew out the basic shape I wanted for the shield. I then cut out the new paper.


Next I traced out the design onto the the first piece of poster board


I then used the utility knife to cut out the shield. I also used the sandpaper to sand down the edges to make them smoother and round out any jagged points


After this point, I felt I needed to make a second cutout of the shield in case of mishaps. I used the shield that I cut out of the poster board top trace the next one.

Now After completing the shield to beyond where part 1 of this tutorial without mishaps to the first cutout, I am glad that I made a second one for something else that will be in part 2 or 3


Once I got both traced, and the first cut out, I wanted to give the shield a concave look. To do this, I propped it up on some RedBull cans and wet down both sides lightly with water from a spray bottle. I then added some weight to the top so that when the water soaks into the poster board, it will give me the desired shape. I left the weight on the shield until it was every so slightly beyond where I wanted the curve to be. Then I removed the weights and let it dry.


During the time that the poster board was setting up for the concave shape, I took my foam and traced some templates for the different designs that go into the shield. I found a template on Google images that I liked and re-sized to fit. This took a lot of trail and error to get the size right, but I think it will be worth the hassle!


With the Tri-Force and smaller triangle cut out of the foam, I used some of the Gold Leaf Rub n' Buff to color them. I like the Rub n' Buff for this because you can give a lot of control to how much you want to use, and its a very nice and real looking color that will help with my desired finish. 


This concludes part 1 of the Hylian Shield tutorial
Stay tuned for part 2!

Saturday, February 2, 2013

Tutorial Choice

Well I didnt get any messages or comments on what tutorial people wanted to see :-(

But thats ok, you get to see what I am making then! Over the next week I will be putting together a tutorial on how to make a Hylian Shield from The Legend of Zelda. Now I will be taking a slightly different approach to the shield. I want to make it look more real world than the cartoonish look of the games.

Stay tuned!

Photo from Zelda.wiki